aws-sdk 를 사용하여 코드 상에서 직접 업로드하는 기능을 추가하여 이미지 업로드 API 를 만들 수도 있지만,
API Gateway 와 Lambda 를 이용하여 좀더 쉽고 빠르게 업로드하는 방법을 구현해보려고 한다.
(참고로 API Gateway 프리티어는 12개월 동안 매달 100만개씩까지만 포함되기 때문에, 그 이상이 될 경우에는 별도로 API 를 구현하는 방식을 채택하는게 좋다.)
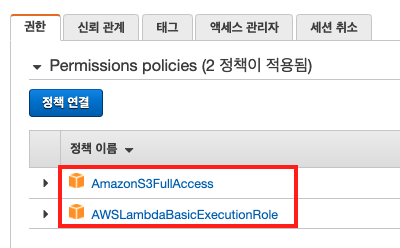
IAM 역할 만들기
두 개의 Policy 를 붙여주자.
- AWSLambdaBasicExecutionRole: AWS CloudWatch > Log Groups 에 Lambda 로그를 남길 수 있는 권한
- AmazonS3FullAccess: AWS S3 모든 버킷에 접근할 수 있는 모든 권한 (s3:PutObject, s3:GetObject 만 있어도 되긴 한다.)
Lambda 함수 생성하기
"use strict";
const AWS = require("aws-sdk");
const multipart = require("parse-multipart");
const bluebird = require("bluebird");

const S3 = new AWS.S3({ region: "ap-northeast-2" });

module.exports.handler = async (event, context) => {
  console.log(JSON.stringify(event));
  const result = [];
  const bodyBuffer = Buffer.from(event["body-json"].toString(), "base64");

  let { header } = event.params;
  header = Object.keys(header).reduce(
    (c, k) => ((c[k.toLowerCase()] = header[k]), c),
    {},
  );
  const boundary = multipart.getBoundary(header["content-type"]);

  const parts = multipart.Parse(bodyBuffer, boundary);

  const files = getFiles(parts);

  return bluebird
    .map(files, ({ params, uploadFile }) => {
      return upload({ params, uploadFile }).then(
        (data) => {
          result.push({ data, fileUrl: uploadFile.fullPath });
        },
        (err) => {
          console.log(` !!!!!!!!! Occurred Error When Upload S3 =====> ${err}`);
        },
      );
    })
    .then((_) => {
      return context.succeed(result);
    });
};

const upload = ({ params, uploadFile }) => {
  return S3.upload(params).promise();
};

const getFiles = (parts) => {
  const files = [];
  parts.forEach((part) => {
    const buffer = part.data;
    const fileFullName = decodeURIComponent(escape(part.filename));
    const fileFullPath = `https://${BUCKET_NAME}/${fileFullName}`;

    const params = {
      Bucket: BUCKET_NAME,
      Key: `${fileFullName}`,
      Body: buffer,
    };
    const uploadFile = {
      size: buffer.toString("ascii").length,
      type: part.type,
      name: fileFullName,
      fullPath: fileFullPath,
    };

    files.push({ params, uploadFile });
  });
  return files;
};
※ part.filename 의 한글이 계속 깨져서 몇시간 동안 애먹었었는데, JAVA 의 경우에는 아래 코드로 해결할 수 있고
new String(filename.getBytes("ISO-8859-1"), "UTF-8")Node JS 의 경우에는 아래 코드로 해결할 수 있었다.
decodeURIComponent(escape(filename))
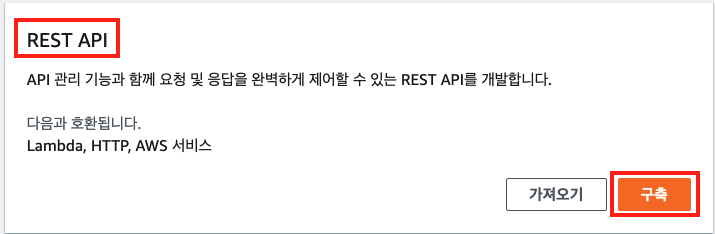
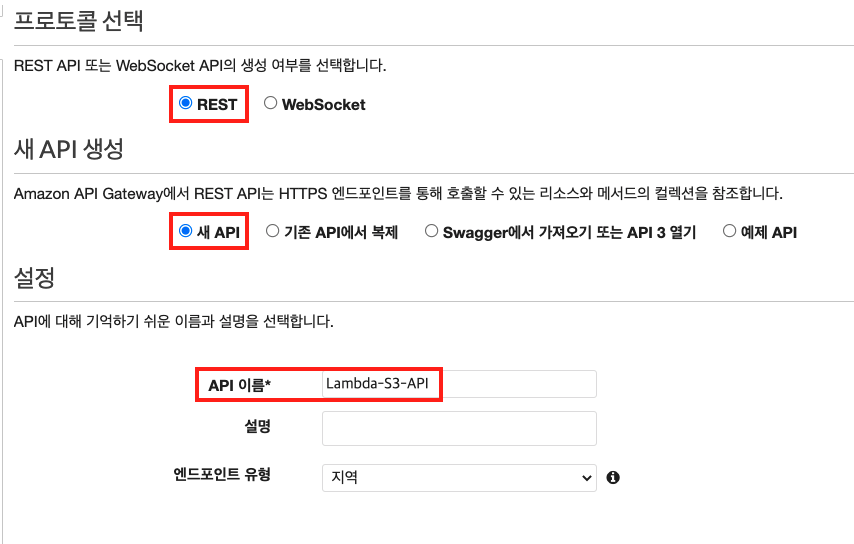
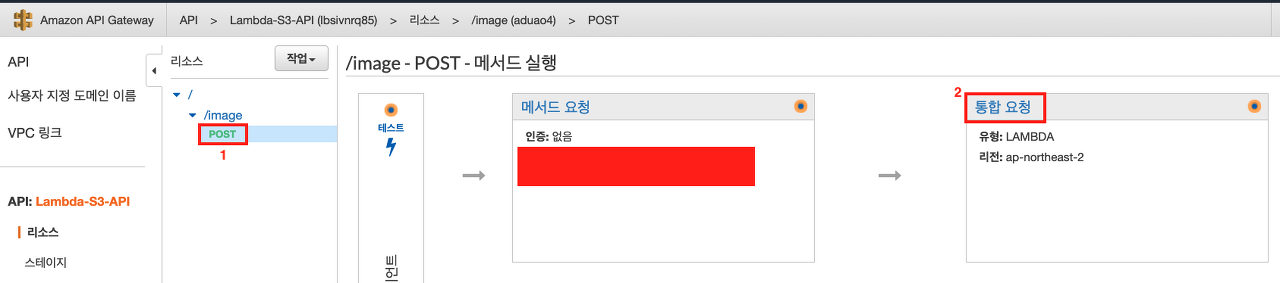
API Gateway 만들기
AWS API Gateway > [Create API] > REST API
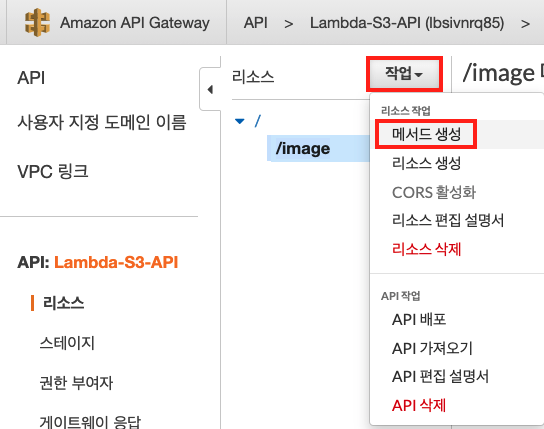
리스소 생성
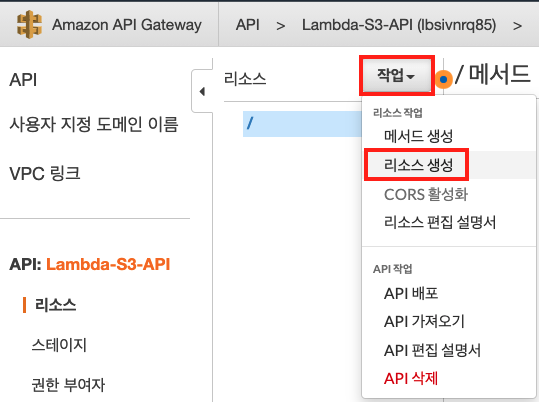

메서드 생성
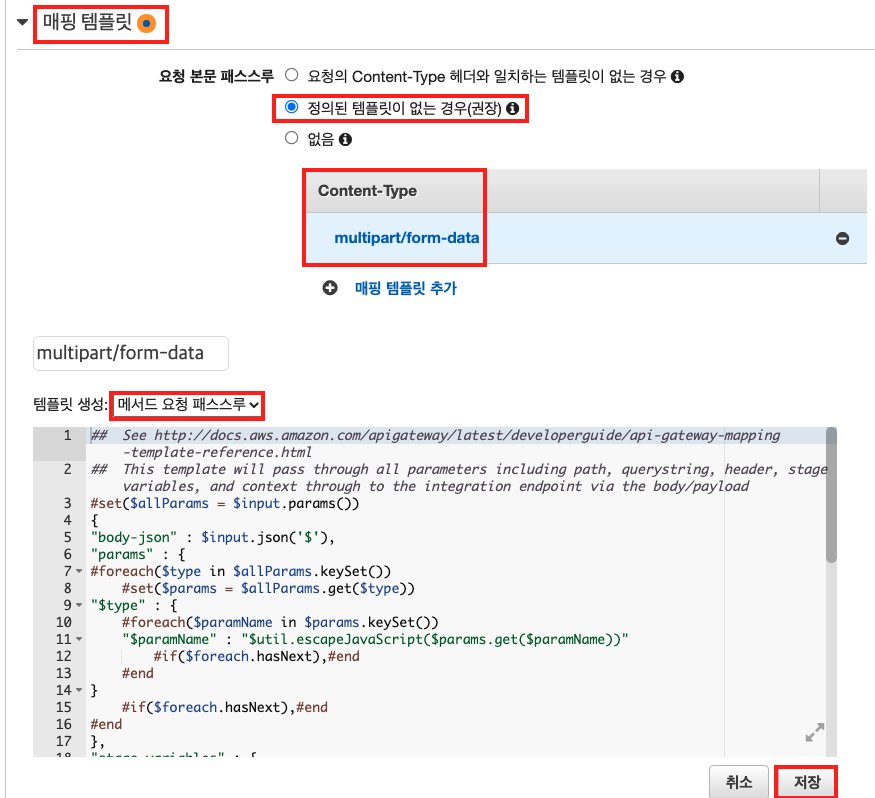
이진 미디어 형식 추가
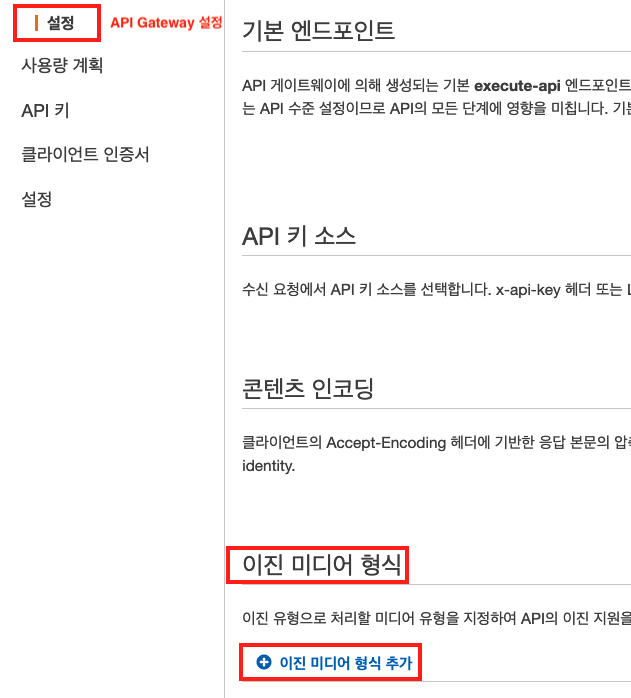

이진 미디어를 추가해주는 이유는 multipart/form-part 형식으로 보낸 파일들을 API Gateway 에서 이진 바이너리 형식으로 변환하여 처리해주기 때문이다.
AWS S3 정책 추가하기
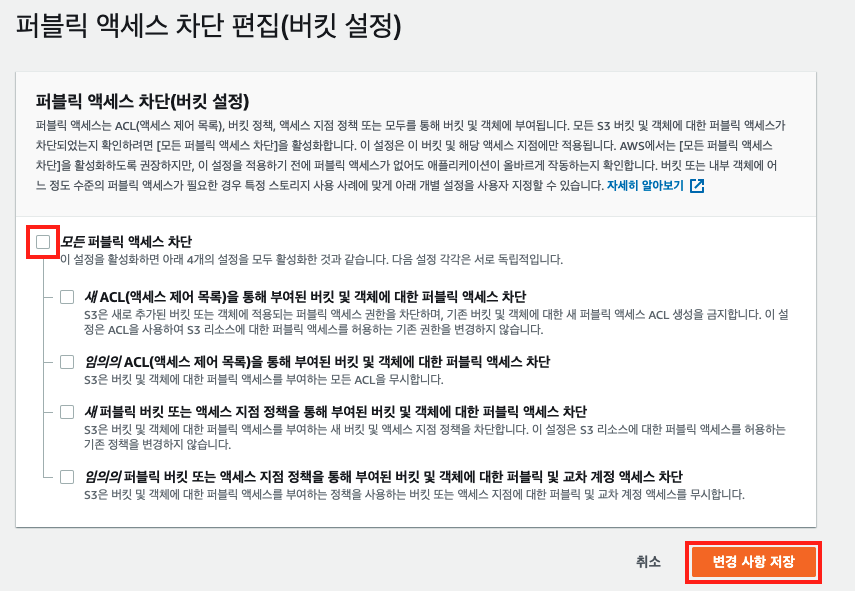
[권한] 탭 > 퍼블릭 액세스 차단을 비활성화 처리

버킷 정책 편집
{
    "Version": "2012-10-17",
    "Id": "Policy1639632675212",
    "Statement": [
        {
            "Sid": "Stmt1639632673739",
            "Effect": "Allow",
            "Principal": "*",
            "Action": [
                "s3:GetObject",
                "s3:PutObject"
            ],
            "Resource": `${S3 Bucket ARN}/*`
        }
    ]
}
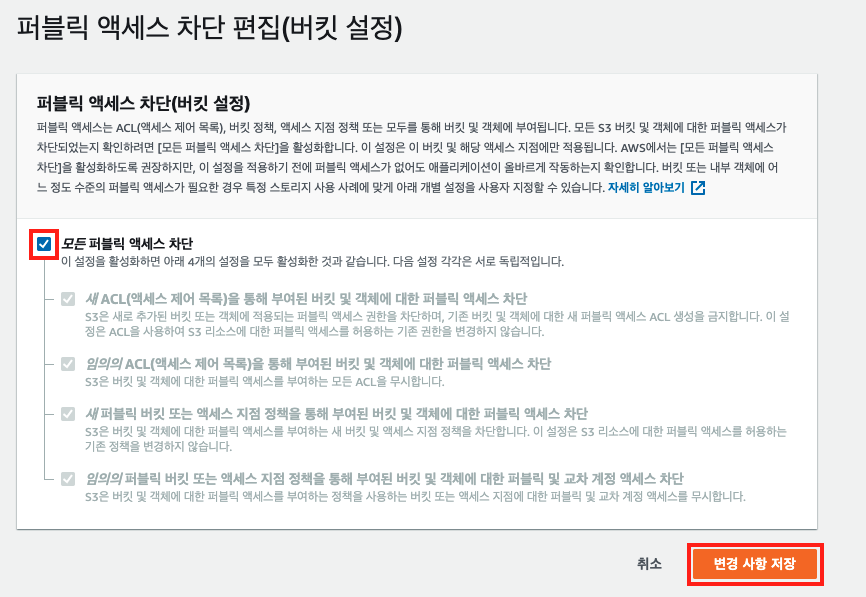
퍼블릭 액세스 차단 다시 활성화 처리
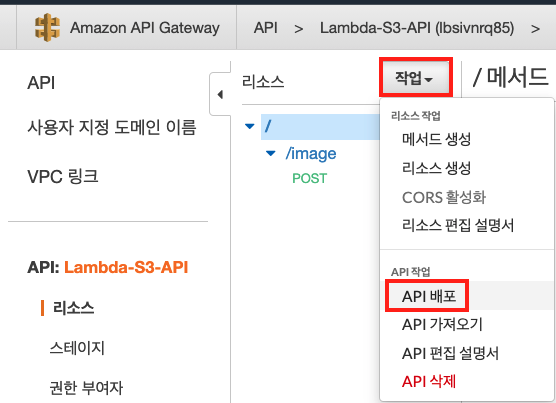
API Gateway 설정 마무리
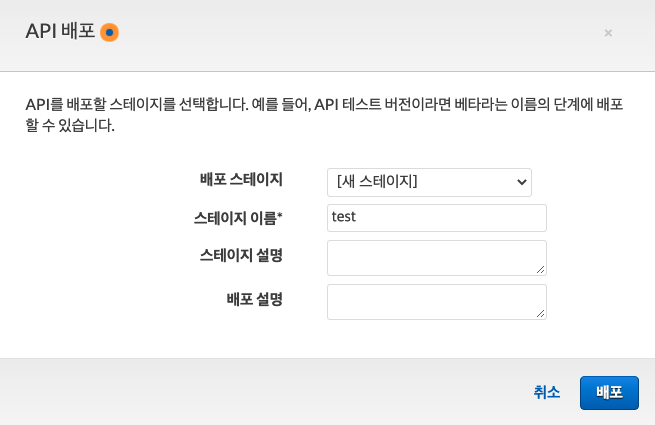
배포

테스트
포스트맨으로 테스트를 해봐도 되고, 나같은 경우에는 코드펜(https://codepen.io/pen/) 에서 html 코드를 작성하여 테스트해봤다.
<form method="post" action=`${위에서 복사한 API Gateway URL}/image` enctype="multipart/form-data">
  <div>
     파일들: <input type="file" name="files" multiple>
  </div>
  <input type="submit">
</form>
'AWS' 카테고리의 다른 글
| [VPC] 개념정리 (0) | 2022.05.06 |
|---|---|
| [API Gateway] REST API 를 Amazon S3 프록시로 생성 (0) | 2022.01.11 |
| [AWS] Glue vs DataPipeline vs DMS vs Kinesis (0) | 2021.12.08 |
| [ECS] AWS ECS 세팅하기 - 3. 서비스 생성 - 블루/그린 배포 2 (0) | 2021.09.12 |
| [ECS] AWS ECS 세팅하기 - 3. 서비스 생성 - 블루/그린 배포 1 (0) | 2021.09.08 |


