728x90
이번에 앱 리뉴얼로 인해 API 도 버전 분리를 하기로 결정했다. Header 에 버전을 추가하여 구분하기로 했는데 문제는 스웨거였다.
JAVA 나 .NET 에서는 스웨거 버저닝 싱크 프로세스가 잘되어 있는데, Nest 에서는...
https://github.com/nestjs/swagger/issues/1810
우리와 같은 Needs 를 가진 사람들이 많으나, Nest 공식 사이트에선 답이 없는데... (열일해라 Nest...⭐️)
이 방법 저 방법 시도해보다가, 결국 아래와 같은 방법으로 해결했다. TypeScript 개발자 모두 화이팅...!
1. 버전 별로 Controller, Service, Module 을 분리한다.
▷ 폴더구조
├── src
│   ├── common
│   │   └── controllers
│   │       └── swagger.controller.ts
│   ├── v1
│   │   └── curation
│   │       ├── curation.controller.ts
│   │       ├── curation.service.ts
│   │       └── curation-v1.module.ts
│   ├── v2
│   │   └── curation
│   │       ├── curation.controller.ts
│   │       ├── curation.service.ts
│   │       └── curation-v2.module.ts
│   ├── curation.module.ts
│   └── main.ts
└── ...
▷ curation.module.ts
import { CurationV1Module } from "./v1/curation-v1.module";
import { CurationV2Module } from "./v2/curation-v2.module";
import { SwaggerController } from "./common/controller.ts/swagger.contoller";

@Module({
  imports: [CurationV1Module, CurationV2Module],
  controllers: [SwaggerController],
})
export class CurationModule {}
2. swagger.json 을 호출해주는 라우터를 만든다.
▷ swagger.controller.ts
import { Controller, Get, Param } from "@nestjs/common";
import * as fs from "fs";

@Controller("swagger")
export class SwaggerController {
  @Get(":version")
  async swagger(@Param("version") version: string) {
    try {
      const data = fs.readFileSync(
        `./curation-v${version}-swagger.json`,
      );
      return JSON.parse(data.toString());
    } catch (err) {
      console.log(err);
    }
  }
}
3. 버전 별 Module 로 스웨거 document 를 생성한다.
const domain = "curation";

const v1 = SwaggerModule.createDocument(
    app,
    options.setVersion("1").build(),
    {
      include: [CurationV1Module],
    },
);
fs.writeFileSync(`./${domain}-v1-swagger.json`, JSON.stringify(v1));

const v2 = SwaggerModule.createDocument(
    app,
    options.setVersion("2").build(),
    {
      include: [CurationV2Module],
    },
  );
fs.writeFileSync(`./${domain}-v2-swagger.json`, JSON.stringify(v2));
4. swaggerOptions.urls 에 2번에서 만든 라우터 주소를 버전 별로 추가한다.
SwaggerModule.setup(`${domain}/docs`, app, document, {
    explorer: true,
    swaggerOptions: {
      persistAuthorization: true,
      urls: [
        {
          name: "v1",
          url: `/${domain}/swagger/1`,
        },
        {
          name: "v2",
          url: `/${domain}/swagger/2`,
        },
      ],
    },
});
▷ main.ts
function createSwagger(
  app: INestApplication,
  description?: string,
): void {
  const domain = "curation";

  const options = new DocumentBuilder()
    .setTitle(`API Docs - ${domain.toUpperCase()}`)
    .setDescription(description || "")
    .addApiKey(
      { type: "apiKey", in: "header", name: AUTH_HEADER_KEY },
      AUTH_API_KEY_NAME,
    )
    .addApiKey(
      { type: "apiKey", in: "header", name: HEADER_VERSION_KEY },
      HEADER_VERSION_NAME,
    );

  const document = SwaggerModule.createDocument(app, options.build());

  const v1 = SwaggerModule.createDocument(
    app,
    options.setVersion("1").build(),
    {
      include: [CurationV1Module],
    },
  );
  fs.writeFileSync(`./${domain}-v1-swagger.json`, JSON.stringify(v1));

  const v2 = SwaggerModule.createDocument(
    app,
    options.setVersion("2").build(),
    {
      include: [CurationV2Module],
    },
  );
  fs.writeFileSync(`./${domain}-v2-swagger.json`, JSON.stringify(v2));

  SwaggerModule.setup(`${domain}/docs`, app, document, {
    explorer: true,
    swaggerOptions: {
      persistAuthorization: true,
      urls: [
        {
          name: "v1",
          url: `/${domain}/swagger/1`,
        },
        {
          name: "v2",
          url: `/${domain}/swagger/2`,
        },
      ],
    },
  });
}
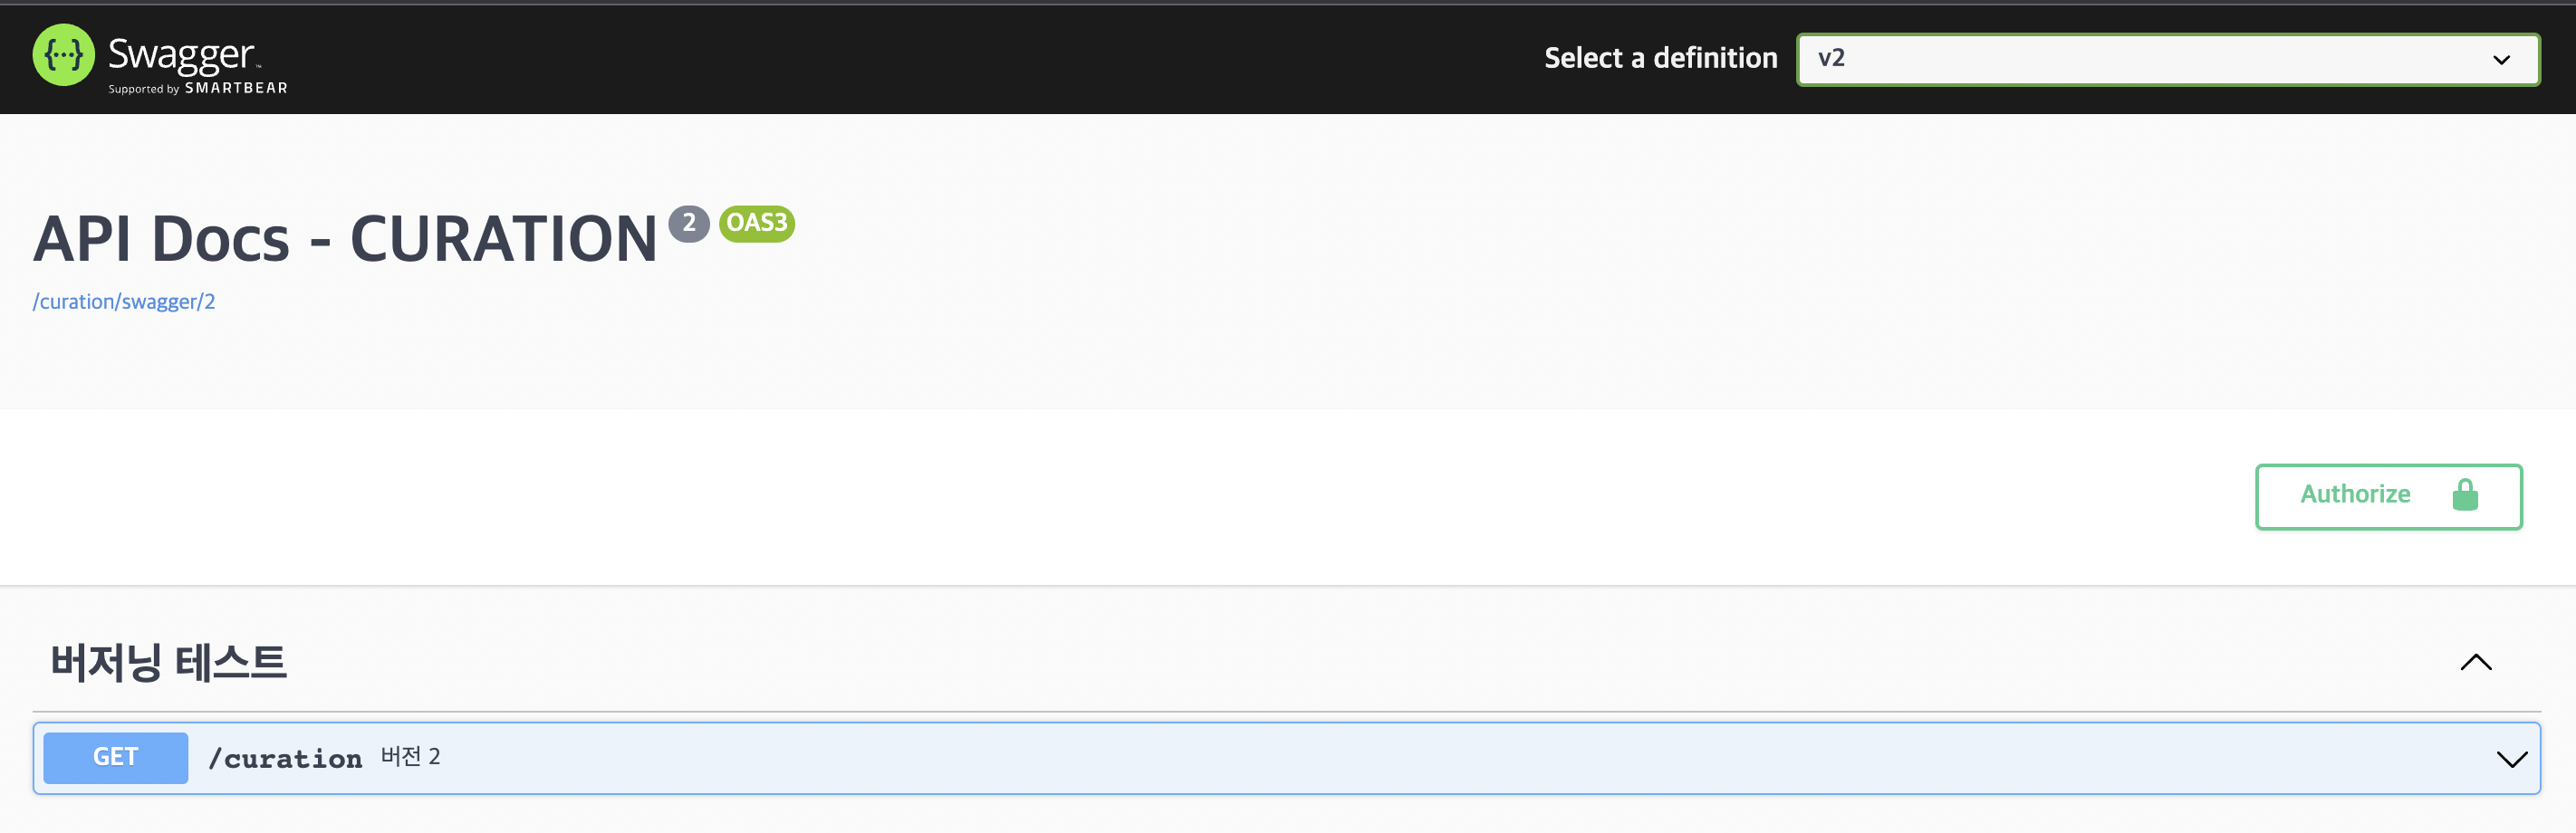
5. app 을 실행해 보면 스웨거를 버전 별로 선택하여 확인할 수 있다.

728x90
'TypeScript' 카테고리의 다른 글
| [Nest.js] 카프카(Kafka) 세팅하기 (0) | 2023.12.07 |
|---|---|
| [Nest.js] DataDog 를 이용하여 trace id, span id 심기 (0) | 2023.10.17 |
| [TypeORM] 데코레이터 - Entity (1) | 2022.09.19 |
| [Nest.js] Custom Decorator (0) | 2022.04.12 |
| [Nest.js] Custom Interceptor (0) | 2022.04.11 |
